Losing data can be extremely stressful. Luckily, ElBackup provides a fast and easy resolution to recover lost data. Please follow the steps highlighted below in order to restore your data.
- Tap the Login button in the upper right-hand corner
- Click Sign in with Google or Sign in with ElBackup located under the ElBackup for Google users tab.
- From the left panel of your dashboard, select any Google service that you are restoring data.
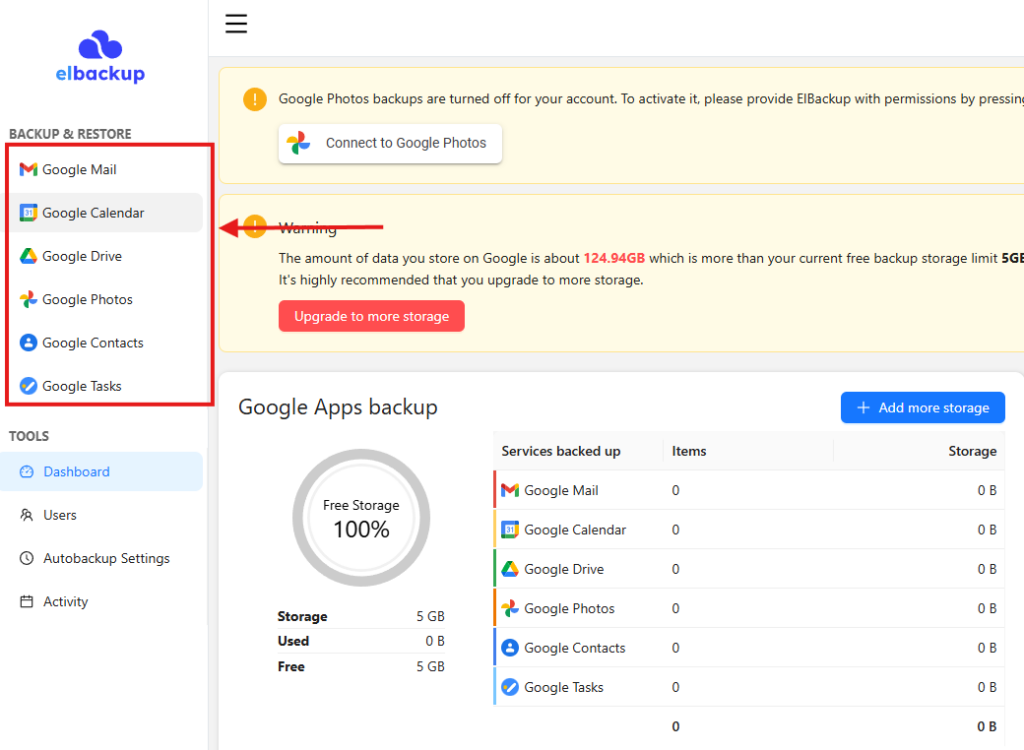
- You will find the Restore button located on the top left hand corner.
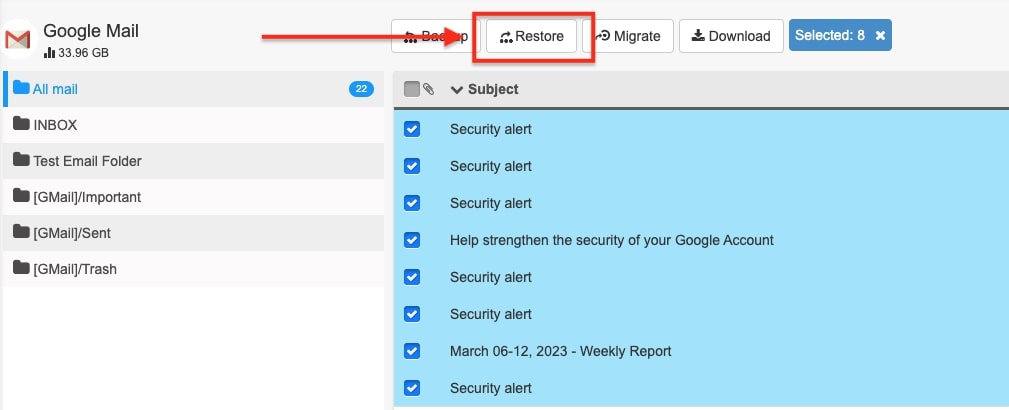
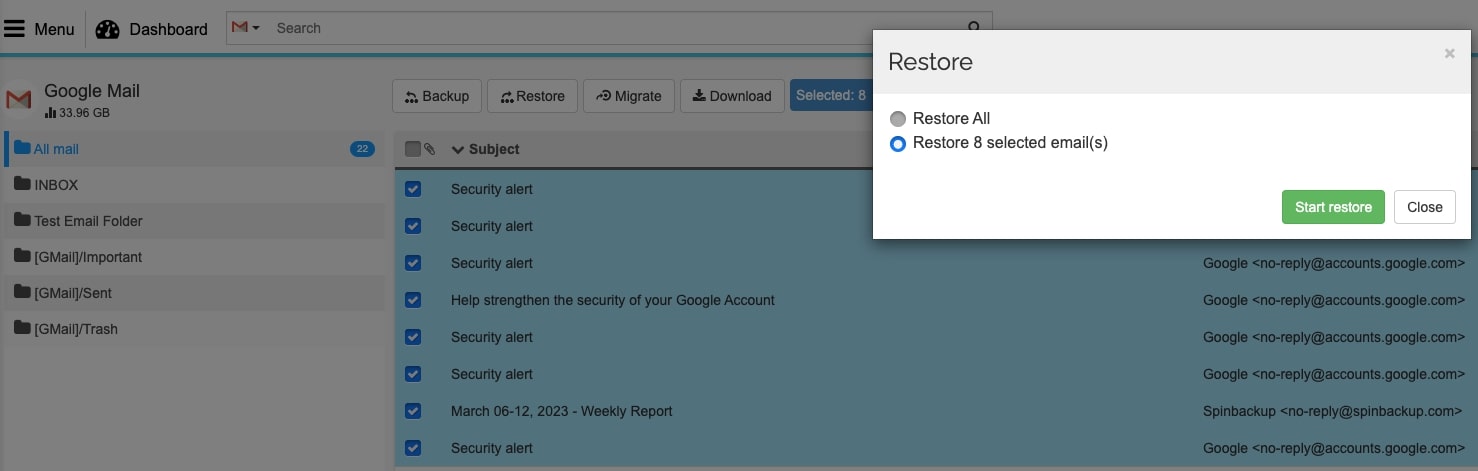
- For all Google services you have chosen to backup, you have two options when initiating a restoration task. You can either restore selected data or restore the entire Google service to your live account.
To restore the entire Google service, simply select the Restore button and then select Start restore from the appearing tab.
In order to restore specific data, you must locate and select the data from each Google service. After selecting the desired data, select the Restore button and then select Start restore.
*If you decide to restore a selected item, you must select the item from the left panel and then select the right pointing arrow in order to move the item into the restore selected only box.
- Once the restore is completed, you’ll see the restored items in your Google Account and service that was restored. A folder will be created by ElBackup and designated as “Restored by ElBackup.”
Now you have learned how to restore lost data. Please don’t hesitate to reach out to [email protected] if you have any questions.