The first automatic backup of your Google data will start shortly after registering for an account. Please note that when an automated backup is queued, you cannot perform a manual backup.
After automated backups have completed, you can begin launching your manual backups.
- Tap the Login button in the upper right-hand corner
- Click Sign in with Google or Sign in with ElBackup located under the ElBackup for Google users tab.
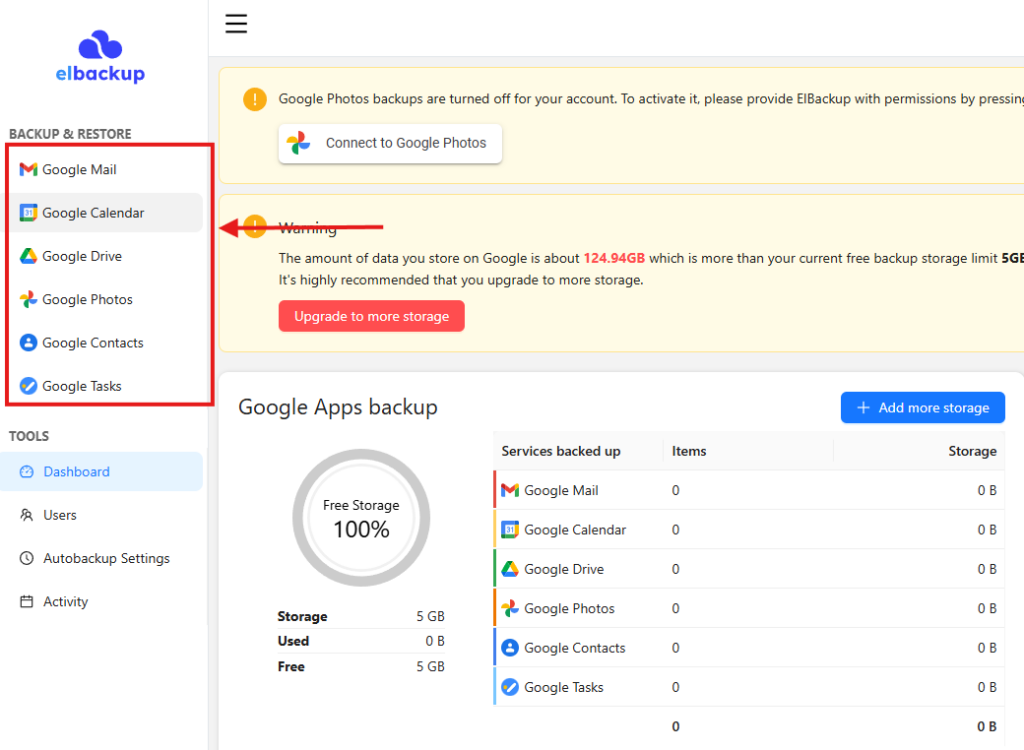
- From the left panel of your dashboard, select any Google service that you are backing up.
- You will find the Backup button located on the top left hand corner.
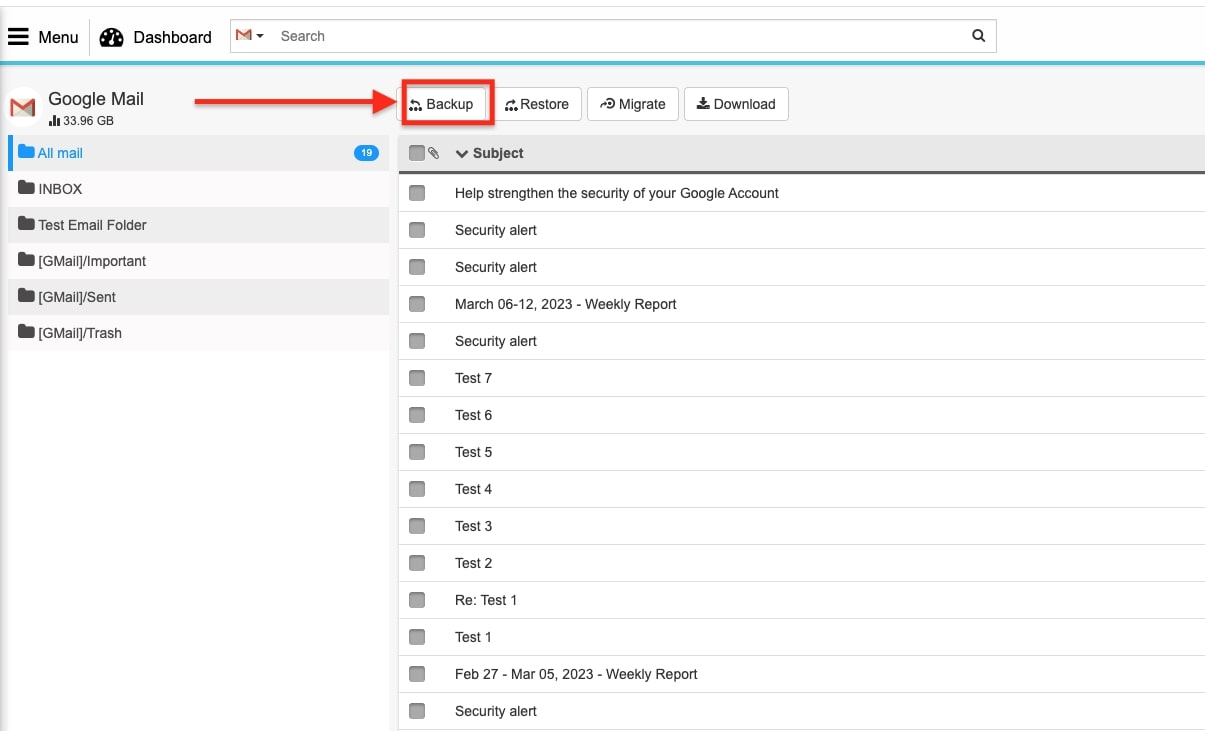
- For Google Mail. Press Backup. A new tab will appear, asking you to select the items you would like to backup.

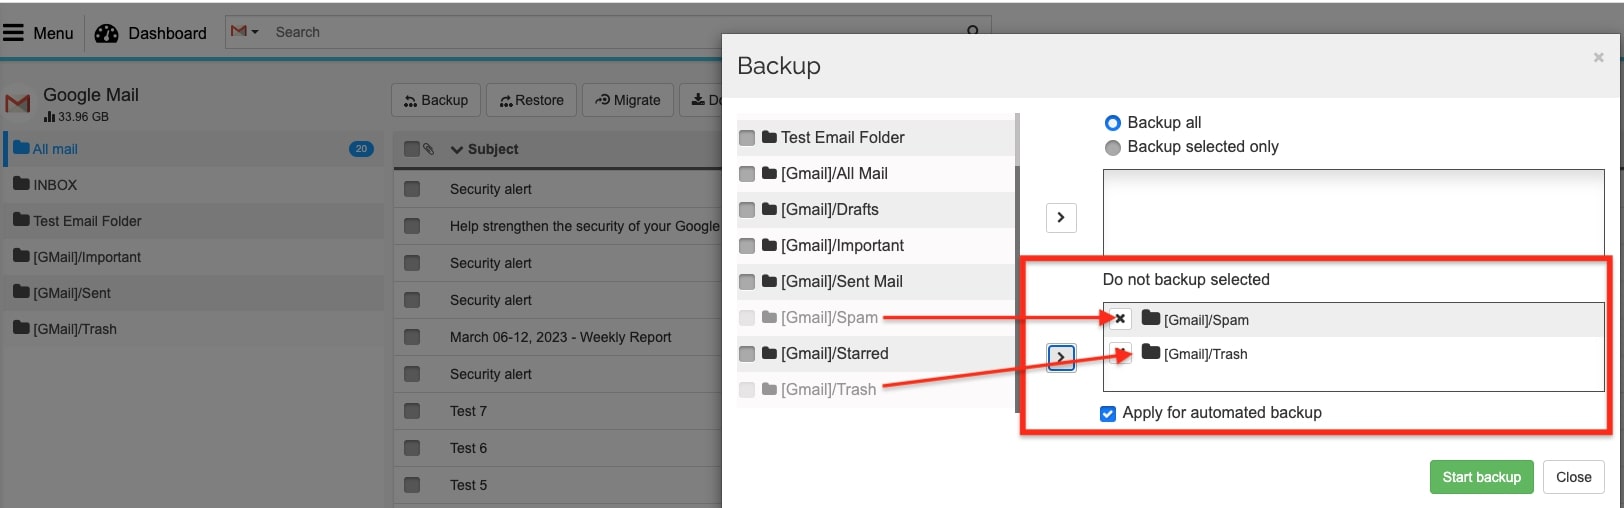
Backup all = backup all data located.
Backup selected only = backup only the selected items.
*If you decide to backup a selected item, you must select the item from the left panel and then select the right pointing arrow in order to move the item into the backup selected only box.
You can also exclude any data from being backed up, by moving the selected folder in the Do not backup selected tab.
Click Start backup in order to initiate the manual backup task.
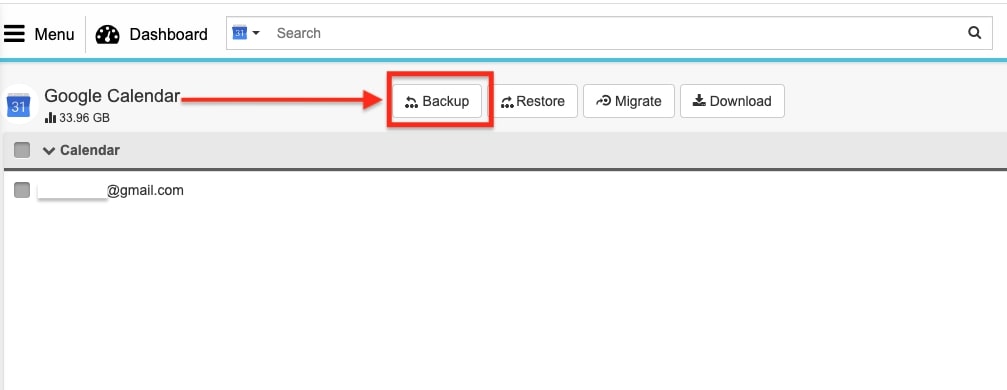
- For Google Calendar. Press Backup. A new tab will appear, asking you to select the email address of the associated Google Calendar.
Backup all = backup all data located.
Backup selected only = backup only the selected items.
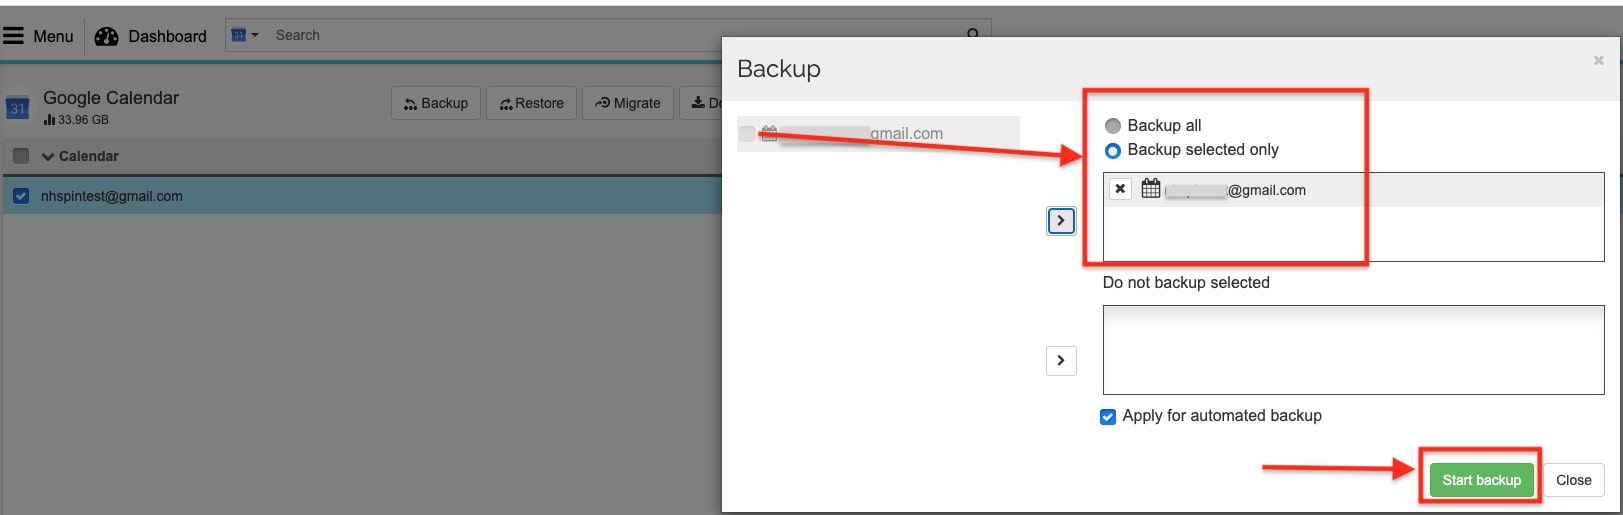
*If you decide to backup a selected item, you must select the item from the left panel and then select the right pointing arrow in order to move the item into the backup selected only box.
You can also exclude any data from being backed up, by moving the selected folder in the Do not backup selected tab.
Click Start backup in order to initiate the manual backup task.
Click to Zoom
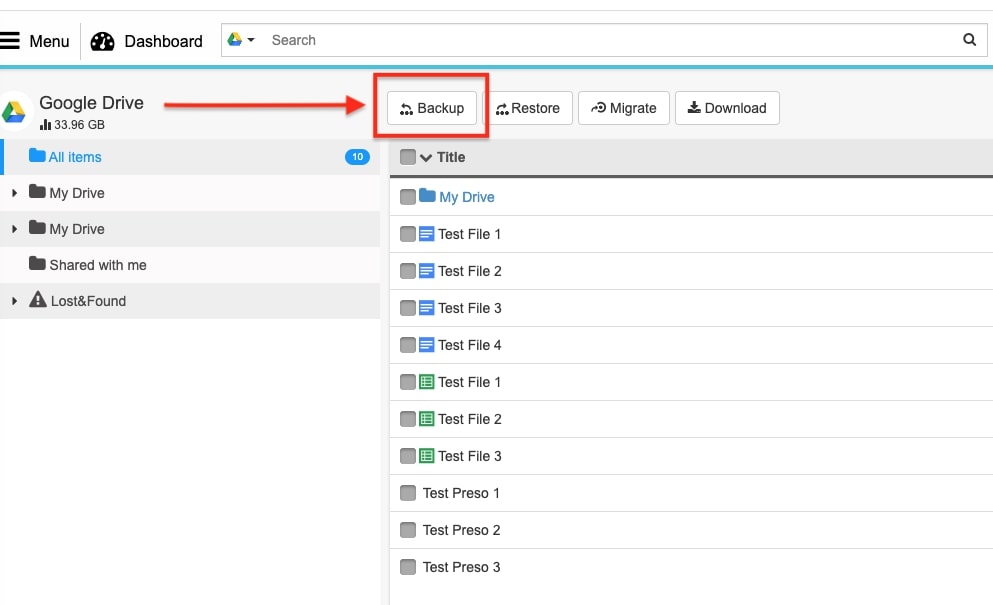
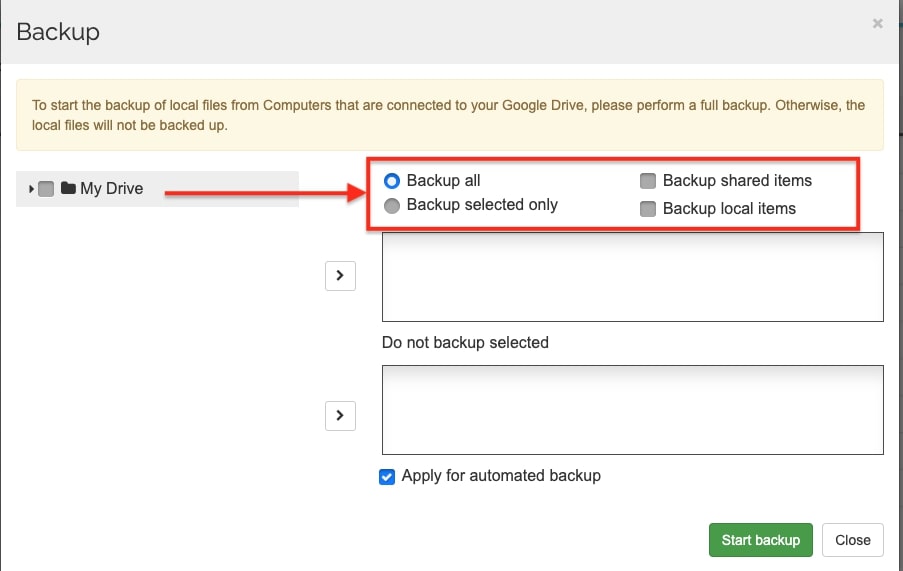
- In the Google Drive page, follow the same steps as highlighted above. Press the Backup button.
Backup all = backup all data located.
Backup selected only = backup only the selected items.
*If you decide to backup a selected item, you must select the item from the left panel and then select the right pointing arrow in order to move the item into the backup selected only box.
Backup shared items = backup data that has been shared to your Google Drive.
Backup local items = Backup data located in Google File Stream.
Apply for automated backups = edit automated backup settings to reflect the selected manual backup task.
You can also exclude any data from being backed up, by moving the selected folder in the Do not backup selected tab.
Click Start backup in order to initiate the manual backup task.
Click to Zoom
- In the Google Photos page, follow the same steps as highlighted above. Press the Backup button.
Click Start backup in order to initiate the manual backup task.
- In the Google Contacts window follow the same steps as with the previous applications. Press the Backup button.
Backup all = backup all data located.
Backup selected only = backup only the selected items.
*If you decide to backup a selected item, you must select the item from the left panel and then select the right pointing arrow in order to move the item into the backup selected only box.
Apply for automated backups = edit automated backup settings to reflect the selected manual backup task.
You can also exclude any data from being backed up, by moving the selected folder in the Do not backup selected tab.
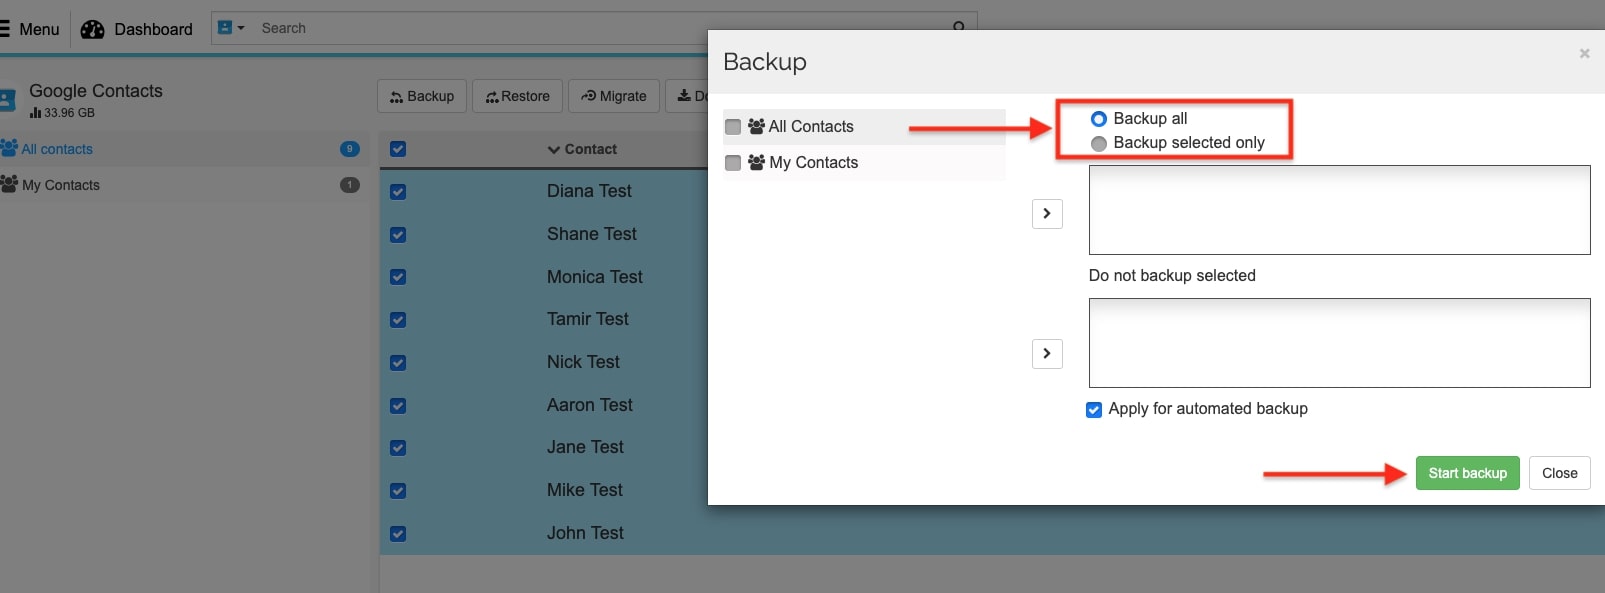
Click Start backup in order to initiate the manual backup task.
Click to Zoom
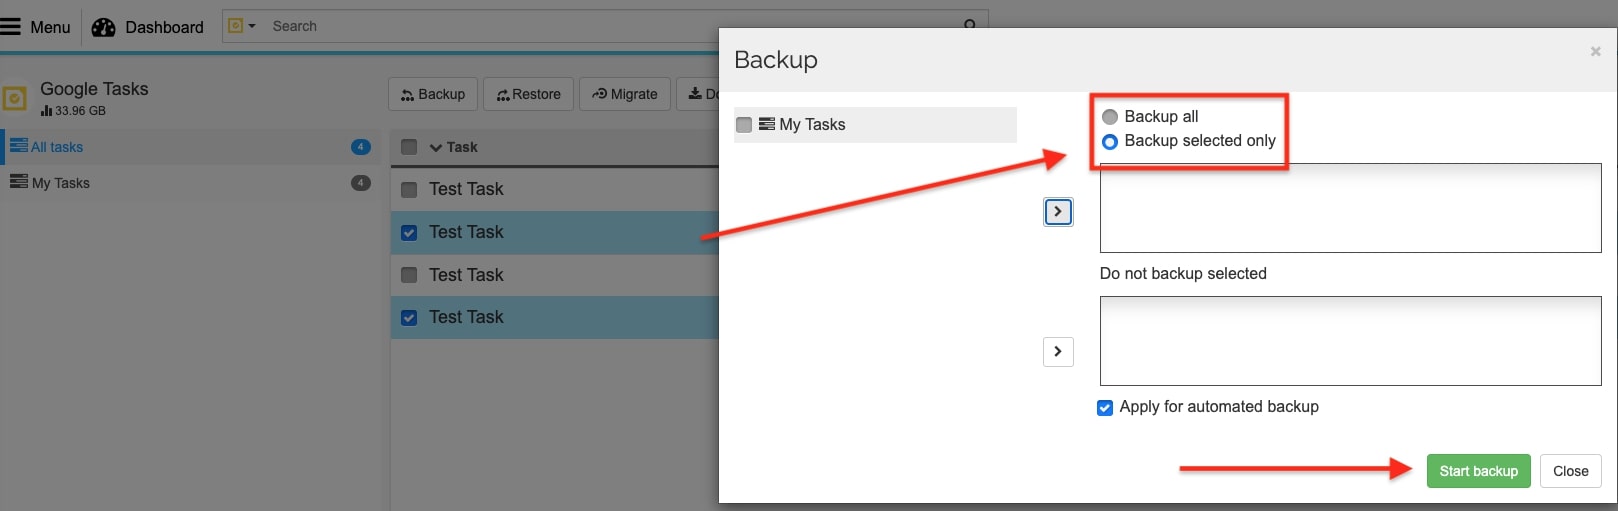
- In the Google Tasks window follow the same steps as with the previous applications. Press the Backup button.
Backup all = backup all data located.
Backup selected only = backup only the selected items.
*If you decide to backup a selected item, you must select the item from the left panel and then select the right pointing arrow in order to move the item into the backup selected only box.
Apply for automated backups = edit automated backup settings to reflect the selected manual backup task.
You can also exclude any data from being backed up, by moving the selected folder in the Do not backup selected tab.
Click Start backup in order to initiate the manual backup task.
Now you learned how to manually backup a Google Account. Please don’t hesitate to reach out to [email protected] if you have any questions.