You can adjust all your account settings from your ElBackup account.
- Tap the Login button in the upper right-hand corner
- Click Login with Google ID or Login with ElBackup ID.
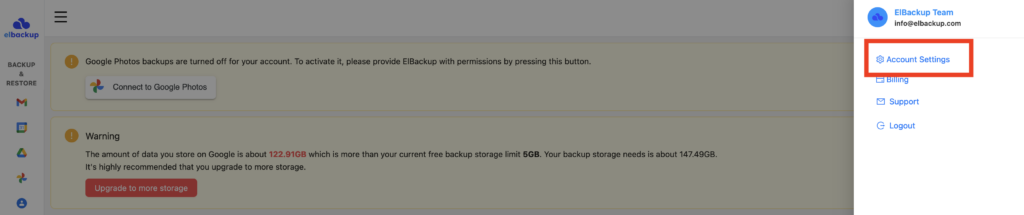
- From the right top of your dashboard, click three dots (Settings) button.
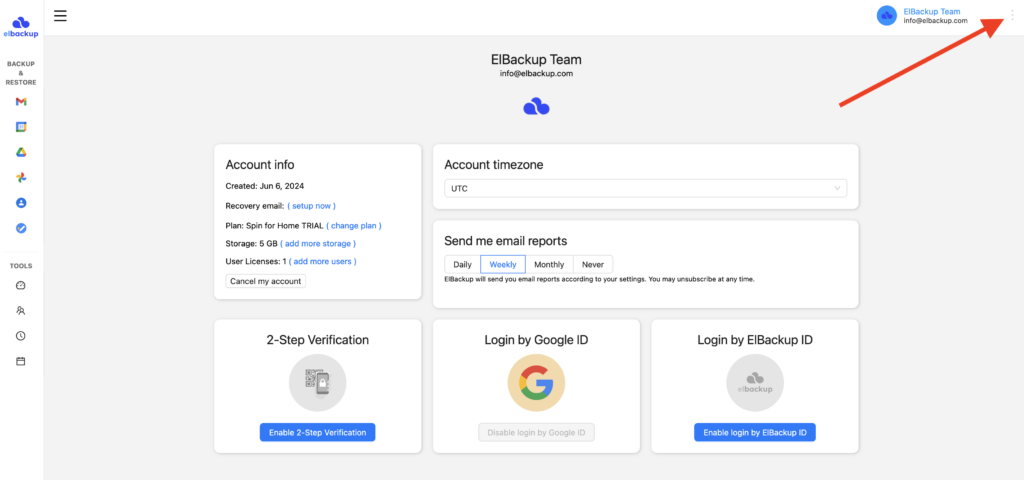
4. Starting from the left side, you will find your general account information including:
- Created: date you signed up for an account
- Recovery Email: password recovery email in case you lose access to your account.
- Plan (change plan): directs you to the Billing page where you can add more users and storage.
- Storage (add more storage): The total amount of storage and option to add more storage.
- User Licenses: Number of licenses you have purchased.
- Cancel my account: cancel your account and delete all backed-up data.
Now choose "Account Settings" from the right navigation menu
5. Login by ElBackup ID
You can set up a secondary login method aside from your Google Credentials. This feature can be found under the "Login by ElBackup ID" tab. These credentials can be used in order to login to your ElBackup account in the event you lose access to your Google account.
6. Login by Google ID
"Login by Google ID" tab allows you to disable the login method using your Google Credentials. This will prevent you from using the "Sign in with Google" option located in the login page. Simply select "Disable login by Google ID" to enable this feature.
You must set up your ElBackup Credentials prior to disabling this feature. Also, if you were to change your Google password, you will have to re-enable permissions for the ElBackup account by logging in using the Sign in with Google method. Failure to do so will result in unsuccessful backups.
7. 2-Step Verification
This feature allows you to set up multi-factor authentication when logging into your ElBackup account. Select Enable 2-Step Verification to enable this feature. A new tab will appear asking you to download the Google Authenticator application. Once you have downloaded the application, scan the QR code that appears on your screen. Lastly, after scanning the QR code, enter the 6 digit code that appears on the application page.
8. Account timezone
You can adjust the time zone from the "Account timezone" tab. Select "Update" in order to confirm changes.
9. Email Reports
"Send me email reports" tab provides the ability to receive account health reports. You have the option to receive these reports either daily, weekly, monthly, or never.
10. Billing details
Lastly, the "Billing details" tab provides a breakdown of the monthly charges to the available balance on the account along with the remaining credit from the annual subscription charge.
Now you are able to configure all your backup settings. Please don’t hesitate to reach out to [email protected] if you have any questions.